
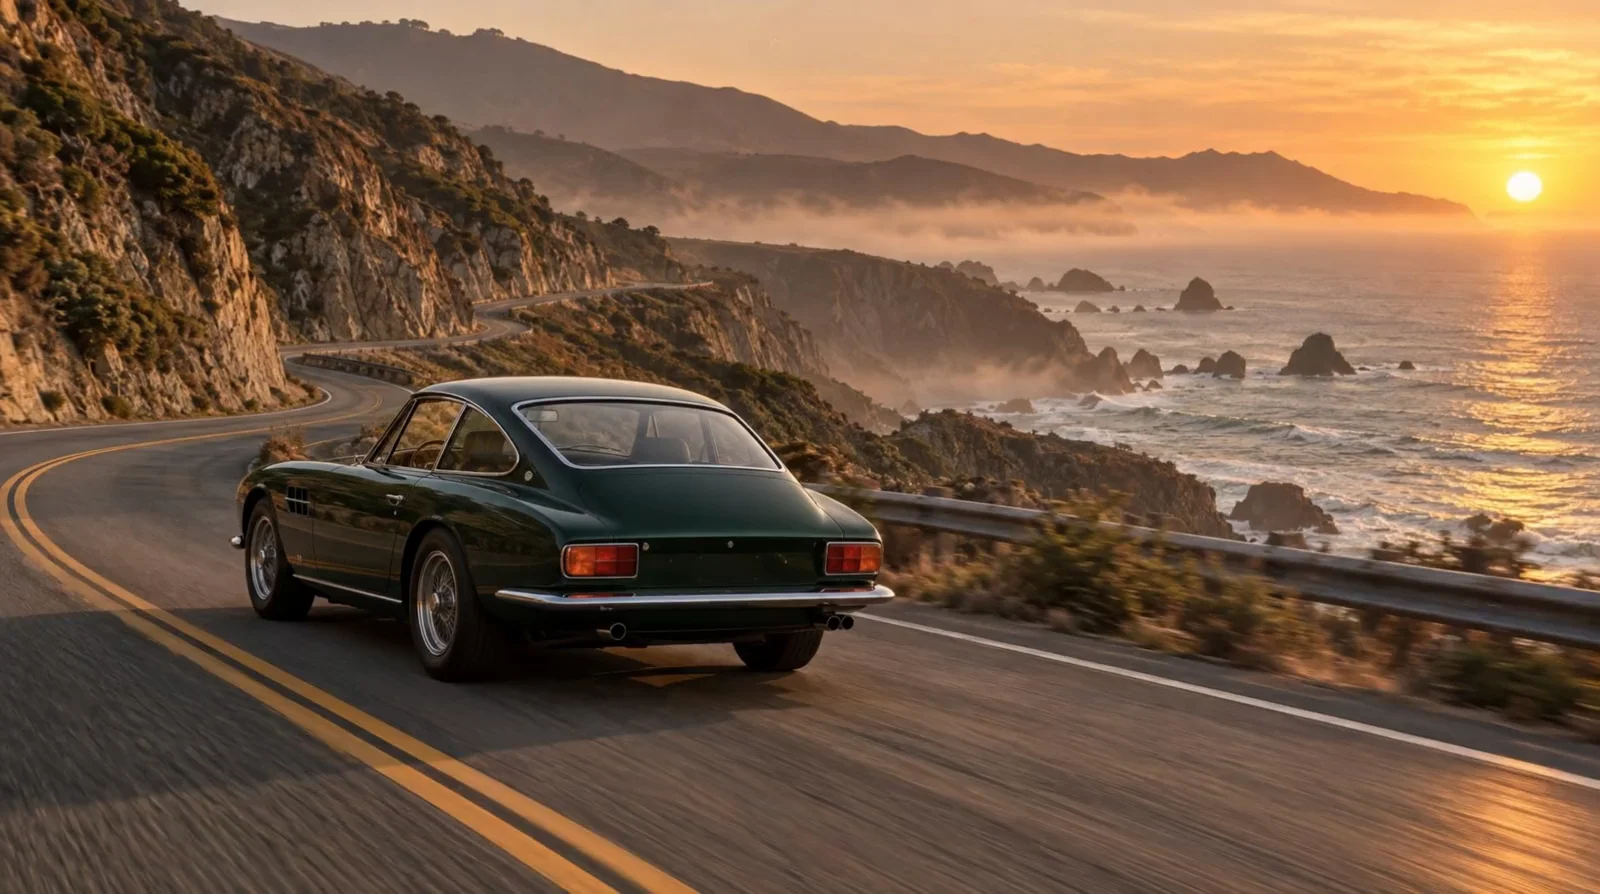
Image to video gives you a concrete starting composition for an AI video. With text to video the model decides what everything looks like. When you start from an image, you've already decided the composition, the subject and the light, and the model uses that frame to guide the generated motion; later frames can still drift.
This guide walks through the whole process, from choosing the frame to downloading the clip, first in the Raywake studio and then through the API.
Step 1: Start with a strong still frame
The video can only be as good as the frame it starts from. A good starting image has:
- One clear subject: a person, a product, a car. Busy frames tend to fall apart once they move.
- Room to move: space in the direction the subject or camera will travel.
- Consistent light: the model carries the lighting forward, including anything odd about it.
You have two options:
- Use your own image. A product photo, a key visual, a character sketch. Only upload images you have permission to use.
- Generate the frame first. Create the still with an image model such as Nano Banana Pro, FLUX.2 [pro], Seedream 4.5 or GPT Image 2.5, then set that result in motion. Use an image output as the input for a compatible video endpoint. Check the endpoint's image requirements and download the frame you want to keep.
Tip: If you generate the frame, fix it before you animate it. Details are much cheaper to correct in an image than in a video.
Step 2: Pick an image-to-video model
Not every video model takes an image as input. On Raywake, Kling 3 Pro supports both image to video and text to video, and it's built for exactly this job: give a still image a sense of motion and direct the scene with a prompt.
Model families can have separate text-to-video and image-to-video endpoints. Veo and Seedance also have image-led variants; choose by the exact endpoint's input schema, rather than assuming the whole family supports one input type.
Step 3: Write a motion prompt, not a description
The most common mistake is describing the image again. The model can already see it. Your prompt should describe what changes:
- Subject motion: what moves, and how (slowly, steadily, suddenly).
- Camera motion: tracking, push in, pull back, static.
- Light and atmosphere: does the light move across the scene?
- Continuity: ask for one continuous shot if you don't want cuts.
Here's an example prompt for a car on a coastal road:
A green sports car follows the coastal road. The camera tracks smoothly beside it while warm evening light moves across the bodywork. Keep the scene continuous.
Notice that it doesn't mention the color of the sea or the shape of the cliffs. Those are already in the image.
Step 4: Check the cost before you run it
Video costs more to generate than images, and the cost depends on the model and settings. On Raywake you see the credits to reserve before anything runs. For usage-billed models, that quote is an upper bound; settlement charges measured usage and releases any remainder. If the generation fails, the reserved credits are released.
A practical habit: run one version, review it, and adjust the prompt before you run variations.
Step 5: Review the whole clip
Watch the clip from start to finish, not just the first second. Check that:
- the subject stays consistent (same face, same car, same logo),
- the camera does what you asked,
- small details stay plausible as they move (hands, text, reflections).
If something is off, change one thing at a time, either the prompt or the frame, so you know what fixed it.
Step 6: Download what you keep
Generated media is stored for 30 days, so download the clips you want to keep and store them yourself.
For developers: the same workflow through the API
The studio and the API use the same models, the same balance and the same prices. The API flow is the same for every model: quote the exact input (free), generate with that quote_id and an Idempotency-Key, then read the job.
To chain image to video, generate the frame and pass its output URL into the video model's image field:
import os, time, uuid, requests

API = "https://api.raywake.com/v1"
H = {"Authorization": f"Bearer {os.environ['RAYWAKE_API_KEY']}"}
TERMINAL = {"succeeded", "failed", "submission_unknown", "needs_review", "needs_reconciliation"}

def run(model, inp):
    payload = {"model": model, "input": inp}
    response = requests.post(f"{API}/quotes", headers=H, json=payload, timeout=30)
    response.raise_for_status()
    quote = response.json()
    print(model, "credits to reserve:", quote["credits"])
    key = str(uuid.uuid4())  # persist this with payload before submitting
    response = requests.post(f"{API}/generate", params={"wait": "true"},
                        headers={**H, "Idempotency-Key": key},
                        json={**payload, "quote_id": quote["quote_id"]}, timeout=200)
    response.raise_for_status()
    job = response.json()
    for _ in range(120):
        if job["status"] in TERMINAL:
            break
        time.sleep(5)
        response = requests.get(f"{API}/jobs/{job['job_id']}", headers=H, timeout=30)
        response.raise_for_status()
        job = response.json()
    else:
        raise TimeoutError(f"Continue polling job {job['job_id']}; do not create a replacement")
    if job["status"] != "succeeded":
        raise RuntimeError(f"{job['status']}: {job.get('error')}")  # don't auto-resubmit
    return job["outputs"][0]["url"]

# 1. The frame
frame = run("nano-banana-pro", {
    "prompt": "A green sports car on a coastal road at golden hour, cliffs and sea in the background",
    "aspect_ratio": "16:9",
})

# 2. The motion
video = run("kling-video/v3/pro/image-to-video", {
    "start_image_url": frame,
    "prompt": "The car follows the coastal road. The camera tracks smoothly beside it. Keep the scene continuous.",
})
print(video)
Running this example starts two paid generations. Install requests and use a funded API key with generate and jobs:read. In an application, persist each payload, idempotency key and job ID. Resume the existing image job after an interruption, rather than restarting both stages.
Each model has its own input schema, so read it with GET /v1/models/{model} before you build requests. Output links are signed for 7 days; fetch the job again for a fresh one.
Keep a useful record of each attempt
Save the original frame beside the prompt and chosen settings. Label each output with its model and job ID, then write down the one change you want to try next. If you change the frame, prompt and model together, a better second clip will not tell you which change helped.
For a product image, compare the silhouette and any readable markings at the start, middle and end. For a portrait, watch the face and hands as well as the camera move. For a landscape, check that foreground objects do not melt into the background. These checks are more useful than deciding from a thumbnail.
When the first pass works, try the intended crop and playback speed in your editing timeline before making more clips. A video can look good on its own and still leave too little space for a caption or an end card. Keep the approved source image, prompt and downloaded result together so the successful setup can be reused.
For budgeting and recovery, read AI video API costs.
Common mistakes
- Describing the image instead of the motion. Say what changes.
- Asking for too much. One subject movement plus one camera movement is plenty for a short clip.
- Animating a flawed frame. Fix hands, text and edges in the image first.
- Changing everything at once. Change one variable per attempt.
FAQ
Can I turn any photo into a video? You need permission to use the image, and it must meet the chosen model's format, size and content requirements. A clear subject with a simple background is a useful starting point; it does not guarantee a consistent result.
What's the difference between image to video and text to video? Text to video invents the whole scene from your words. Image to video uses your frame as a visual reference, so you set the starting composition. Details may change as the clip develops.
How much does it cost? It depends on the model and settings. Raywake shows the credits to reserve before each run, with measured settlement for usage-billed models. See pricing.